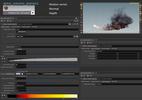
z plus volume planes.
This is a shop digital asset which can be used to render image planes including motion vector,depth and normal pass for volume.
How to use:
For rendering motion vector pass:
1:Set the image plane name for exporting.
2:If the camera for rendering is a still one,turn on "still camera" and set"shutter time" by hand.If the render camera has animation,turn off “still camera",and set the "cam full path" to choose the camera for rendering.
3:This asset is supposed to be used only for rendering motion vector,normal or depth pass for volume, you may have other shader like billowsmoke or pyro shader for color renderding,So,tweak the parameter like "post density scale" or remap the density field to match your color pass.
4:Add image plane with the same name on your mantra node.
tips:
when renderding dynamic volume,make sure you have cached it with "vel" field.
If volume being rendering is still or "vel" field is not found,it will be considered as (0,0,0).
User does not need to tick on “Geometry velocity blur” on geo node. Turning on “Allow motion blur” on mantra node is not needed too.
For rendering volume normal:
1:Set the image plane name for exporting.
2:Parameter “red light” “green light” and “blue light” represent there position relative to the voxel being rendering,and be aware of the length of the vector you set will differ the result,because that represent the distance between the light and the volume,so please check the size of your geometry.
For rendering volume depth:
Set the image plane name for exporting.
tips:
Parameters from "cam data" tab stores the data about camera,it's used for motion vector pass.You do not need to change them.
Other parameters at the bottom just like the native billowsmoke shader,In case these parameters are enough for your rendering,you don't have to use two shader nodes and two mantra nodes to get all you need .You can just use this single one to render all passes.
Feel free to contact me if you have any question.
Author : Peng Zhang
Email: zp86@foxmail.com